MZA Overlay Servers
MZA Overlay Servers act as a centralized container for managing groups and tags, enabling scalable and efficient access control within the COSGrid environment.
Instead of creating and assigning groups repeatedly for individual users, Overlay Servers allow administrators to:
Define groups once
Reuse them across multiple users and policies
This approach ensures:
Consistency in group assignments
Simplified administration
Scalable user management
Overlay Servers can be associated with one or multiple users, making them a key component in large-scale deployments.
Navigation: Organization → Configuration → MZA Overlay Servers
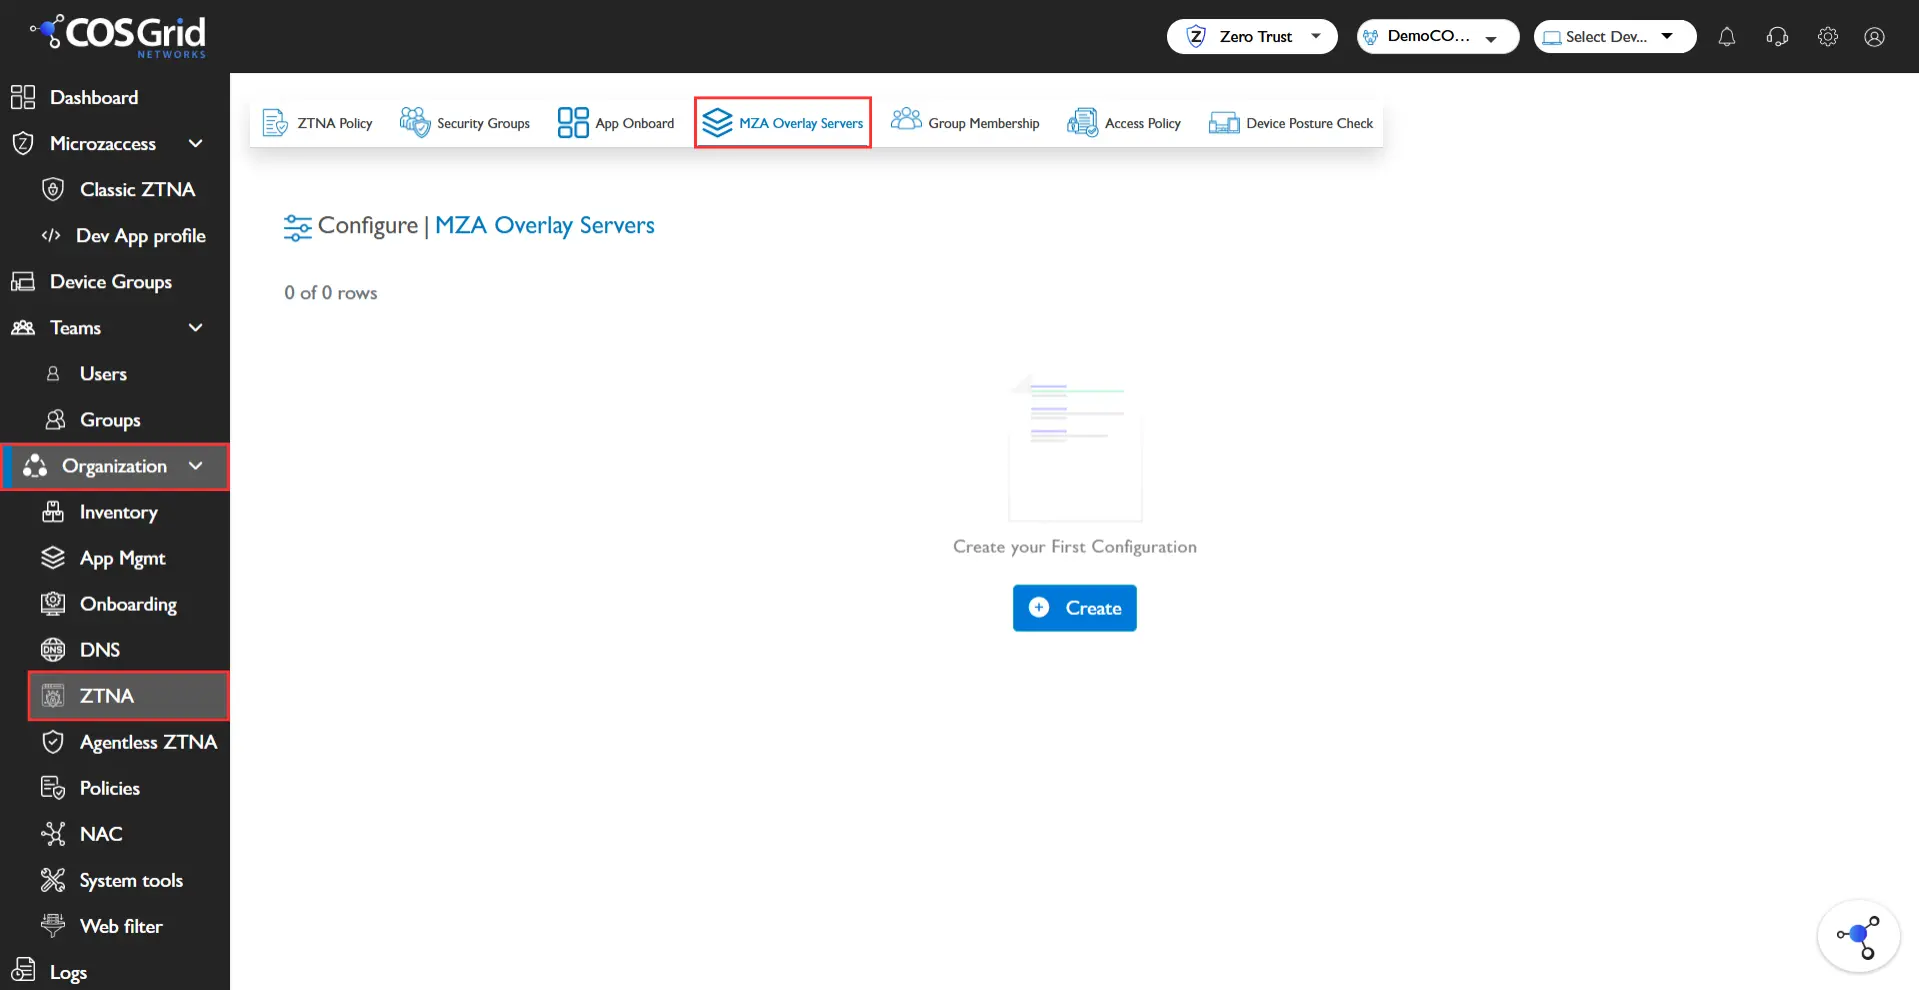
Components of MZA Overlay Servers
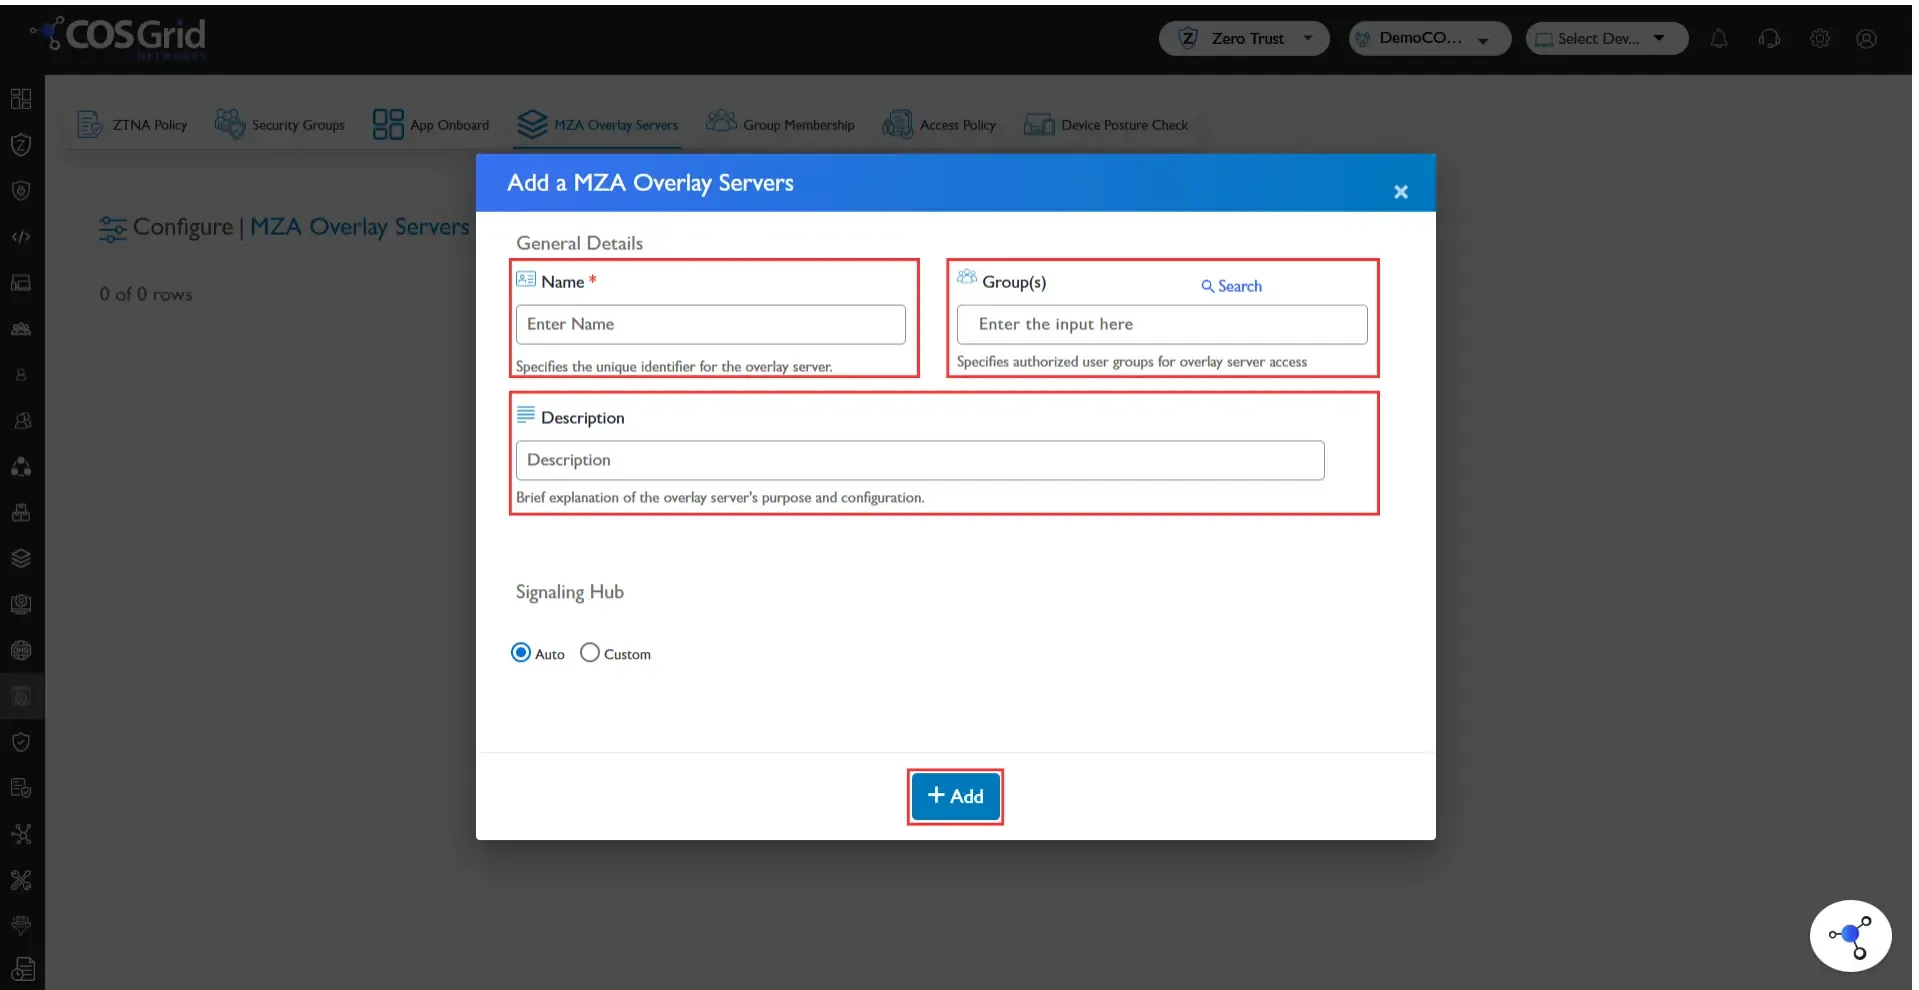
Each Overlay Server includes the following elements:
Name: A unique identifier for the overlay server.
Example: QA_Overlay_ServerDescription: A brief explanation of the overlay server’s purpose for easier identification and management.
Groups: Defines the user or device groups associated with the overlay server.
Groups are reused across users
Ensures consistent policy enforcement
Reduces duplication of configurations
Signaling Hub: Handles communication between endpoints and the overlay network.
Auto Mode
Automatically manages communication settings
Recommended for most deployments
Reduces manual configuration effort
Custom Mode: Allows manual configuration with the following parameters:
Public IP → External IP address for communication
Port → Communication port
Subnet → Network range used for overlay communication
Key Features
Search: Quickly locate overlay servers.
Download: Export overlay server configurations for:
Backup
Audit
Compliance
Column Customization: Select and display specific fields for better management visibility.
Add: Create new overlay servers.
Delete: Remove unused or obsolete overlay servers.
Creating an MZA Overlay Server
Step 1: Initiate
Click Add to open the overlay server configuration form.
Step 2: Basic Information
Enter Name
Provide Description
Step 3: Assign Groups
Select or enter the required Groups
These groups will be applied to associated users
Step 4: Configure Signaling Hub
Choose one of the following:
Auto (Recommended): System automatically handles communication settings
Custom: Manually configure:
Public IP
Port
Subnet
Step 5: Finalize
Click Add to create the Overlay Server.
Example Configuration
Objective
Create an overlay server for QA environments.
Configuration
Parameter | Value |
Name | Example_MZA_Server |
Description | This is a sample MZA Overlay server |
Groups | |
Signaling | Auto |
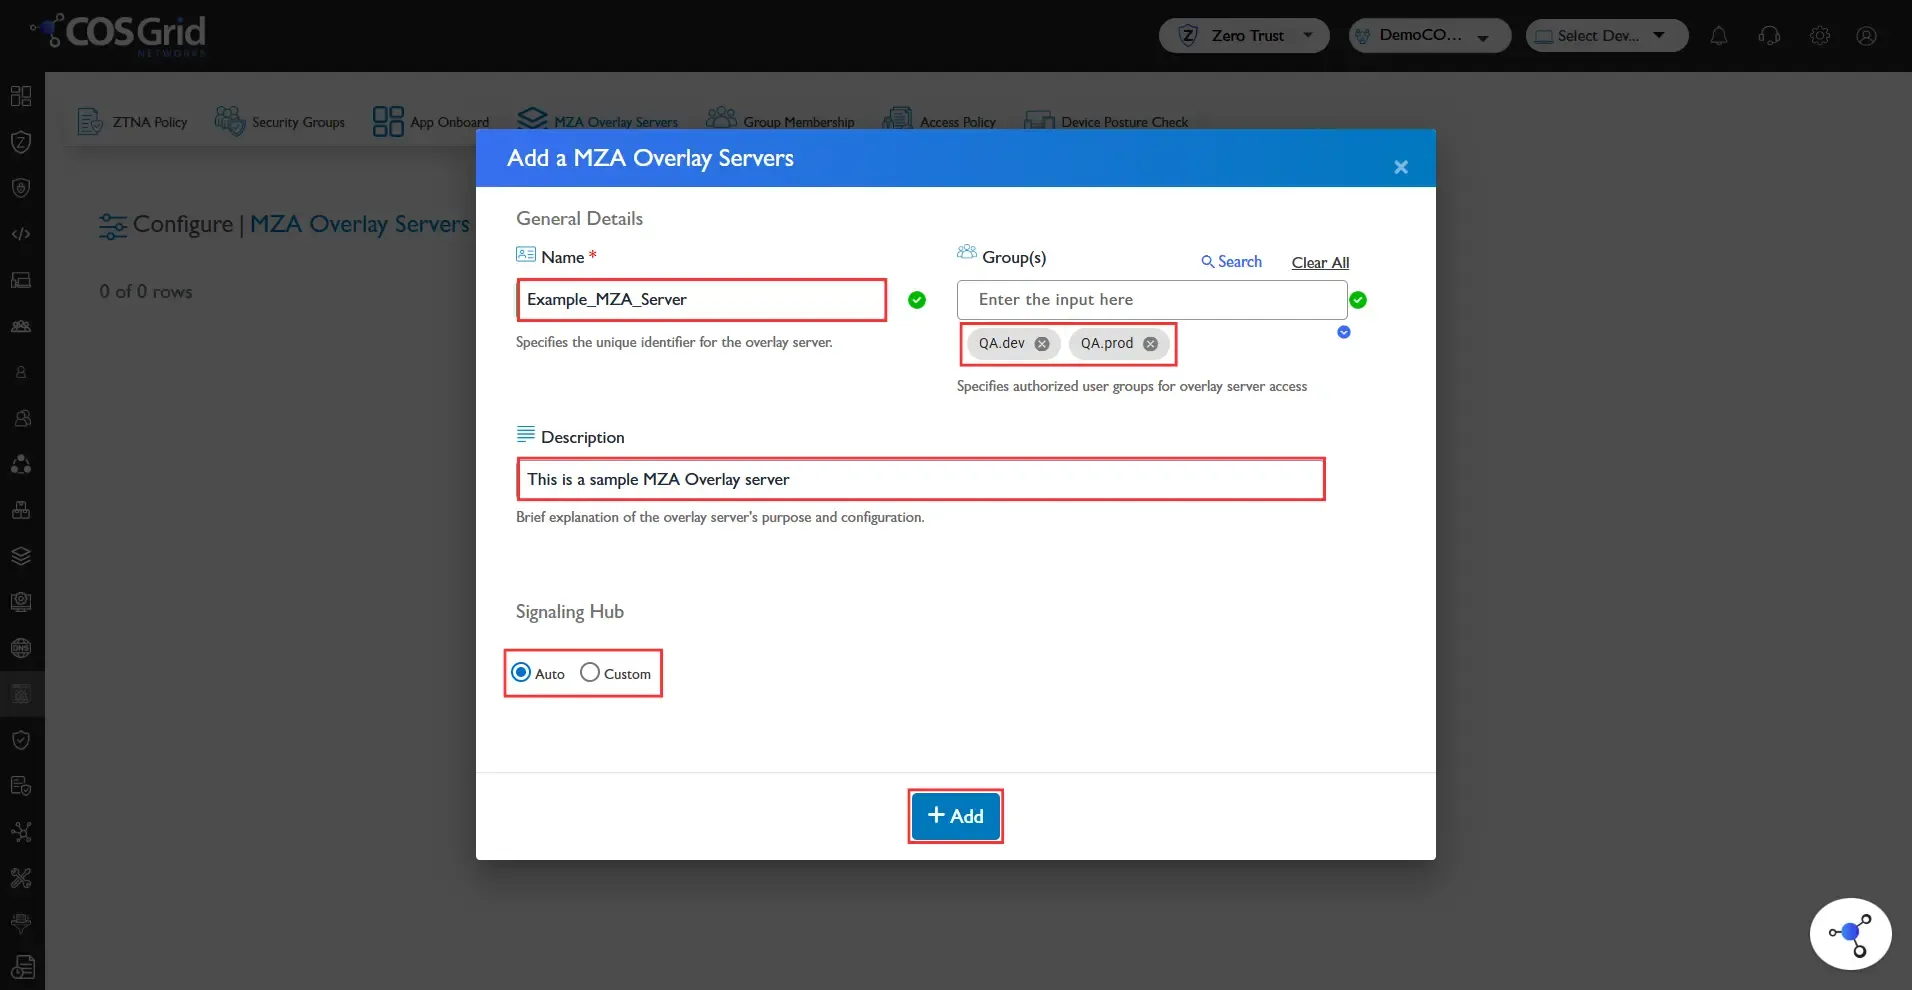
Steps
Click Add
Under Basic Information:
Name: Example_MZA_Server
Description: This is a sample MZA Overlay server
Under Groups:
Under Signaling Hub:
Select Auto
Click Add
Result
An MZA Overlay Server is created that:
Centrally manages QA-related groups
Can be assigned to multiple users
Simplifies group reuse and policy consistency
Best Practices
Use descriptive naming conventions (e.g., Env_Department_Purpose)
Prefer Auto mode unless custom networking is required
Group related users logically (e.g., Dev, QA, Prod)
Avoid duplicating groups across multiple overlay servers
Regularly audit and clean up unused overlay servers
How Overlay Servers Fit in Architecture
MZA Overlay Servers act as a group abstraction layer that works alongside:
App Onboard → Defines application access
Security Groups → Controls traffic rules
DPC (Device Posture Check) → Validates device security
Together, they enable:
Centralized policy management
Scalable Zero Trust architecture
Consistent access enforcement